Advance-topics/recover-from-a-failed-custom: Difference between revisions
Agent Kith (talk | contribs) No edit summary |
Agent Kith (talk | contribs) No edit summary |
||
| Line 20: | Line 20: | ||
sudo update-grub | sudo update-grub | ||
</syntaxhighlight>{{ManualNavigation|[[advance-topics|Advanced Topics]]|[[advance-topics/nf9c-bios-for-usb|NF9C BIOS Setup For USB]]|[[advance-topics/ubiquity-partitioning|Ubiquity Partitioning]]}} | </syntaxhighlight>{{ManualNavigation|[[advance-topics|Advanced Topics]]|[[advance-topics/nf9c-bios-for-usb|NF9C BIOS Setup For USB]]|[[advance-topics/ubiquity-partitioning|Ubiquity Partitioning]]}} | ||
[[Category:Advanced Topics]] | |||
Latest revision as of 09:43, 30 July 2020
Advanced Topics
- Quick Start Guide
- Language Translation
- Native DSD Support
- NF9C BIOS Setup For USB
- Recover From A Failed Custom Kernel
- Ubiquity Partitioning
- Persistent USB
- Different Machines For LMS and Squeezelite
- Build Your Own Custom Kernel
- Custom Kernel To Install Snakeoil OS
- Merging Technologies - Ravenna/AES67 Support
- Sideload Snakeoil Firmware
Back To Main
So you tried your hand in building your own custom kernel and it fails. Fret not as it is extremely easy to get it back to a working state. You just need to connect your keyboard and monitor back and change the boot sequence manually.
Mini SVGA/HDMI Monitor
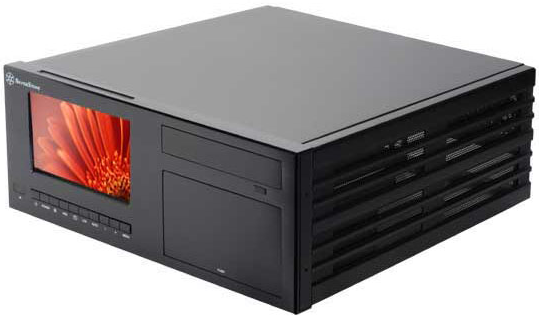
If you like to experiment a lot, consider investing in a small LCD monitor (with SVGA and HDMI input), like the one shown below:
These monitors are compact and can be tucked away when not in use. (Above picture is provided as illustration only, it's not a recommendation).
Another approach is to spend the money and get a case with a built in monitor. The downside of a LCD case is the bulkiness, and the connection is not always internal (e.g. if your motherboard don't have a internal HDMI/VGA header you have to route the connection out externally). Given the price, this is not a practical solution, but it looks cool! Some motherboards support LVDS monitors but I havn't tried them yet.
Recovering From A Unsupported Kernel
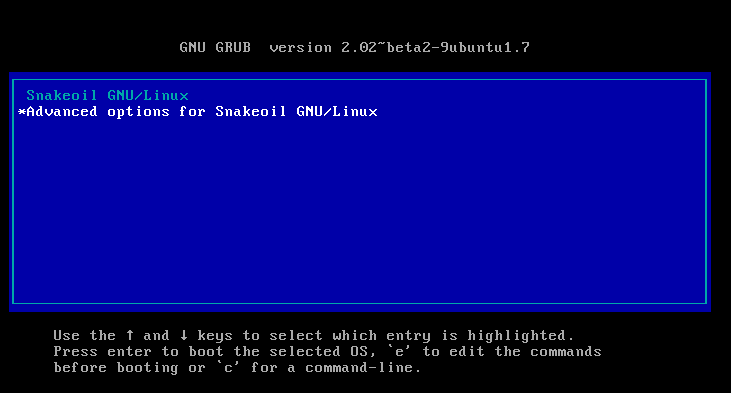
Connect the monitor and keyboard, boot up the computer and hit any arrow key immediately until you see this screen. You only have a short window to do this, reboot the machine again if you are not quick enough.
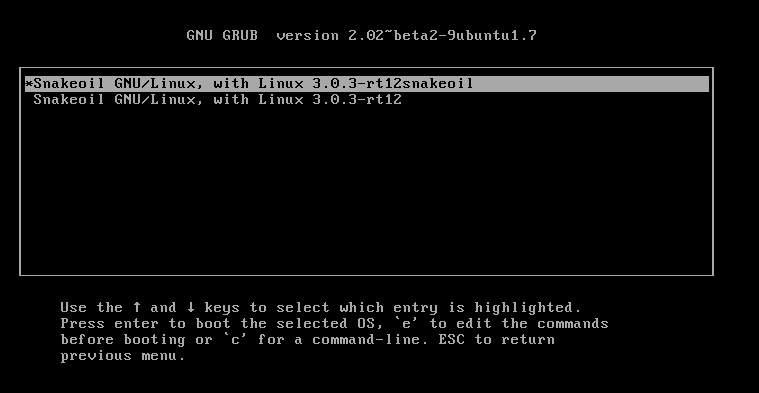
Once you see the screen above, make sure the entry "Advanced options for Snakeoil GNU/Linux" is selected (see example below), and hit the "Enter" key.You should see something like this.Select the first line from the list (Linux 3.0.3-rt12snakeoil in the example) and press the "Enter" key.
The machine should boot up fine now. Return to the Snakeoil menu, and select another working kernel.
Free Edition
Login to the machine, remove the problem files, modify /etc/default/grub and remove the default line, and finish by running this command:
sudo update-grub


